
2 Jul 2024
Step-by-Step Guide to Installing Crazy Paving on a Wall Using Natural Stones
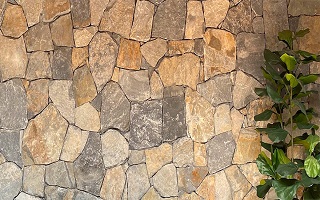
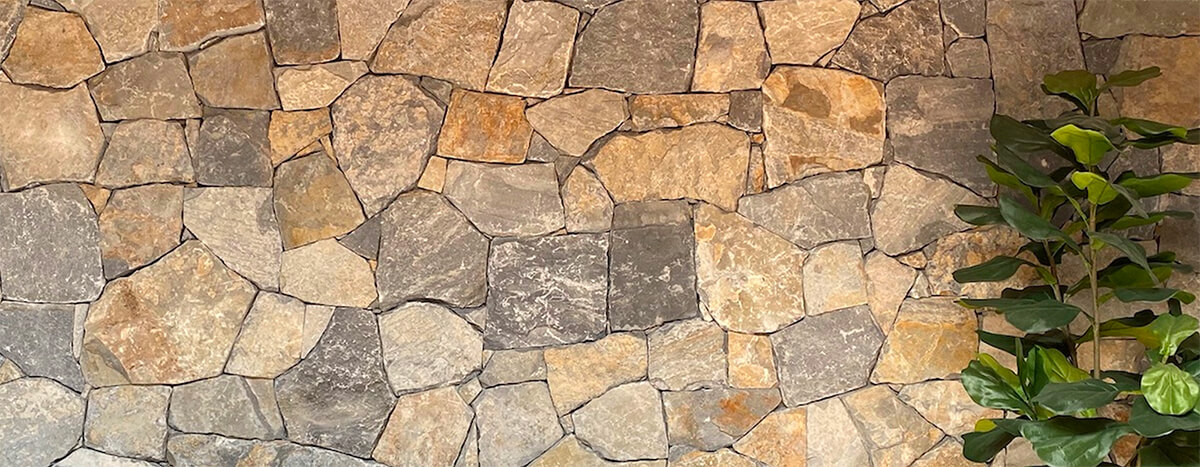
We understand that you are always looking for something unique, attractive and durable materials for your home. Crazy paving is one of the designs that will elevate the look and feel of your space and make it look unique. Natural stones add beauty to any space, and incorporating them into your project transforms your space into a captivating haven of beauty. Crazy paving is popular for adding character and texture to walls and outdoor spaces. Its irregular pattern and use of natural stones can create a unique and visually appealing feature. It is important to understand that each step plays a crucial role in setting up a strong base and overall result.
This step-by-step guide will walk you through the process of installing crazy paving on a wall using natural stones, ensuring a professional finish that enhances your space. You will also learn how to prepare the ground for crazy paving.
Let’s get started!
How to Install Crazy Paving on a Wall?
Step 1: Planning and Preparation
It is important to take the time to design and plan your wall’s crazy paving pattern. These include the size of the wall, the kind of stones you intend to use in making that wall and even the appearance you want to achieve. Make sure the wall onto which the stone is to be applied is clean, dry and free from cracks. Make sure that there is no crack or any form of imperfection in the wall before its application.
Step 2: Mixing Mortar or Cement
As required by the manufacturer, blend the mortar or cement according to the required proportion. It should have consistency through which the stones are fixed without moving a lot but it should not be very watery or very thick. It is a good idea to mix portions at a time to avoid this during preparation so that the mixture can be moistened frequently.
Step 3: Applying Mortar on the Wall
With a trowel, strike a bed of mortar or cement to the portion of the wall. You will commence with the placing of stones. This is useful when working on manageable sections of the wall so that the mortar does not stiffen up before it is used. Ensure the consistency of mortar as you work; if it starts to stiffen or dry out, discard it and replace it with fresh mortar.
Step 4: Placing the stones
Start making contact with the natural stones with the mortar in the recommended arrangement. Crazy paving involves randomly putting stones, so ensure that when buying stones, you get several stones of different shapes and sizes. Squash each stone into the mortar until the material sticks well to the other; this produces good contact between the stones and the mortar.
Step 5: Fitting Stones Together
Ensure that the stones are tightly packed, then the gaps that will be left between the stones will be small. It is fine if some of the stones are slightly smaller, but if there are some rather large ones, it is best to split them so they fit better. The focus should be on attaining a flat surface to the extent possible, yet slight variations are normal and modern crazy paving thrives on the latter.
Step 6: Leveling and Adjusting
Every now and then, use a spirit level to determine how high or low the stones are. Modify some of them using a rubber mallet to tap the stones or if there is a need to add more mortar at the bottom to have a levelled surface.
Step 7: Grouting
After the stones are set and the mortar has become rigid, likely within 24-48 hours, make the grout as directed on the package. On the way to uncover new layers, work the grout float and press the grout into the stones to ensure they are packed without gaps on them. While working on a section, wash off the residual grout on the surface of the stones with a damp sponge before it begins to set.
Step 8: Cleaning Up
After grouting, it is necessary to wash the surface of the stones with a damp sponge to remove the grout residue. Try as much as possible not to disturb the grains in the area between the stones and the grout lines. The grout should be allowed to cure according to the manufacturer’s direction on how long it should be left to fix.
Step 9: Sealing (Optional)
For water damage and staining, do not allow it to rinse with water after the grout has been set. Add a waterproofing sealer over the surface of the crazy paving. The specifics of how it is used should be according to the instructions provided by the manufacturer when it comes to application as well as drying.
Step 10: Finishing Touches and Maintenance
After that, you should check the structure of the completed crazy paving wall for stones that are loose or for any places that might require additional filling of the gaps. Take proper repairs where needed to ensure the stability of the installation is not compromised. To retain the aesthetic value of the wall over time, you should clean and Inspect the stones in a timely manner.
Conclusion
Embarking on a crazy paving project using natural stones for your wall promises not just a new aesthetic but a lasting transformation. By meticulously following the steps outlined and maintaining attention to detail, you’ll craft a stunning feature that enhances both indoor and outdoor spaces. Whether it’s a garden wall or an interior accent, the irregular beauty of crazy paving ensures a unique allure that evolves with time. Enjoy the creative process and the satisfaction of creating your enduring stone artwork. Here’s to many years of enjoying the beauty and craftsmanship of your stone-clad space!
Here are a few more blogs that will help you to learn more about Crazy Pavers:
Step-By-Step Guide on How to Lay Crazy Paving
Crazy Pavers: A Stylish Twist to Your Outdoor Spaces